What to Include on Your Wedding Website (And How to Set It Up)


You’ve decided to create a wedding website – great call. Now comes the bit that trips most couples up: what actually goes on it?
The answer depends on how far along your planning is, but there’s a core set of sections that every wedding website needs, and a handful of extras that take it from functional to genuinely brilliant. This guide covers both, plus a walkthrough of exactly how to set everything up using Bridebook’s free wedding website builder.
Wedding website vs wedding invitation: what’s the difference?
Before we get into content, it’s worth being clear on this – because the two serve different purposes, and understanding that will help you decide what goes where.
Your wedding invitation is a formal announcement. It tells guests the essential facts: who’s getting married, when, and where. It’s typically short, beautifully designed, and sent well in advance. There isn’t room – or really a need – for much more than the basics.
Your wedding website is everything else. It’s where guests go once they’ve received their invite and want more detail. It can be updated as plans evolve, accessed any time, and holds as much information as you want to share.
Here’s a practical split:
| Wedding invitation | Wedding website |
|---|---|
| Your names | Full schedule of the day |
| Date and time | Venue address + map + parking |
| Venue name | Accommodation recommendations |
| RSVP details (or direct to website) | Dress code details |
| Wedding website URL | RSVP form |
| Wedding hashtag | Gift list |
| Travel and directions | |
| FAQs | |
| Your story and photos |
The short version: your invitation gets guests through the door; your website answers every question they have between now and the big day.
The essentials: what every wedding website needs
These are the non-negotiables – sections guests will actively look for, and that you’ll regret not having once the “Just checking…” messages start rolling in.
1. Your names and wedding date
Sounds obvious, but the very first thing on your wedding website should be your names and the date, presented clearly. This is what guests see first, and it immediately confirms they’re in the right place.
On Bridebook, this is the first thing you set up when building your site. Your names and date appear prominently at the top of every template.
2. Your venue
Include the full wedding venue name and address – not just “Elmwood Hall” but the full postcode too, so guests can drop it straight into Google Maps or a sat nav. If your ceremony and reception are at different locations, list both with separate addresses.
Consider adding:
- A direct link to the venue website
- Parking information (is it on site? Is there a fee?)
- Nearest train station or bus stop
- Any venue-specific quirks guests should know (no heels on the lawn, the car park closes at midnight, etc.)
3. RSVP form
This is one of the most valuable features a wedding website offers – an online RSVP that feeds directly into your guest management, no spreadsheets required.
On Bridebook, you can customise your RSVP form to ask exactly what you need: attendance confirmation, meal choices, dietary requirements, plus-one details, and more. You can also set an optional RSVP deadline so guests know exactly when you need their response.
A tip on wording: Be specific. “Please RSVP by 1st August” is much more effective than “Please respond when you can.”
4. Schedule of the day
Give guests a clear timeline so they know what to expect and when to arrive. You don’t need to include every logistical detail – just the key moments:
- Ceremony (time and location)
- Drinks reception
- Wedding breakfast / dinner
- Evening reception / dancing
- Any other key events (morning-after brunch, for example)
On Bridebook, the schedule tool lets you add each event with a start time, end time, and description. You can add as many events as you need – including post-wedding events like a brunch the following morning.
5. Gift list
Include a direct link to your gift registry so guests can browse and buy without having to track down the details themselves.
If you haven’t set one up yet, Bridebook has partnered with the UK’s top gift list providers so you can create one in minutes directly through your wedding website:
Set up your list with one of these partners thrhttps://www.theweddingpresentcompany.co.ukough Bridebook and you’ll receive £50 towards your wedding list once £200 has been spent.*
You can also link to any other registry you’d like – Amazon, John Lewis, or a charitable donation link if you’d prefer guests give to a cause instead.
Terms apply. £200 must be spent to qualify.
6. FAQs
An FAQ section is one of the most-visited parts of any wedding website – and one of the most effective at reducing the volume of messages you receive.
The questions you’re already being asked? Put them here.
Common ones to include:
- What’s the dress code?
- Are children welcome?
- Is there parking at the venue?
- What time should we arrive?
- Is the venue accessible?
- Can I take photos during the ceremony?
- Where do you recommend staying nearby?
- Is there a gift list?
- Are plus-ones invited?
- What happens if I have a dietary requirement not listed on the RSVP?
You don’t need to answer every conceivable question – just the ones you know are coming.
The extras: sections that make your website memorable

These aren’t strictly necessary, but they’re the difference between a website that’s useful and one that guests actually enjoy.
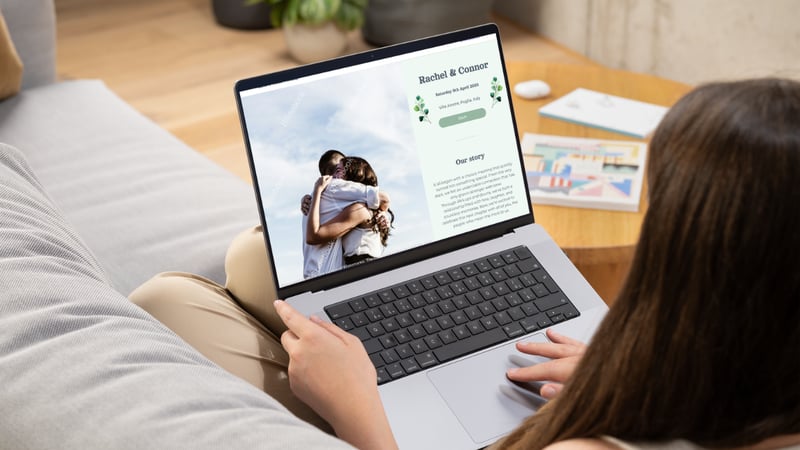
Our Story
The “how we met” section is consistently the most-read part of a wedding website. Guests are there to celebrate your relationship – they genuinely want to know the story behind it.
You don’t need to write an essay. A few honest paragraphs covering how you met, a memorable early moment, and the proposal is plenty. Add some photos – an engagement shoot if you have one, or just a favourite photo together – and it immediately makes the site feel personal.
On Bridebook, the ‘Our Story’ section gives you space to share your story in your own words alongside photos.
Not sure what to write? Start with three things: where you first met, the moment you knew, and how the proposal happened. That’s usually more than enough.
Accommodation recommendations
If guests are travelling from out of town – or if your venue is in a rural location – a short list of recommended places to stay nearby is genuinely useful.
Include a mix of price points if you can, and flag if there are any room blocks reserved under your name.
Travel and directions
Beyond the venue address, consider adding:
- The best route by car (and any common sat nav errors – some venues have postcodes that drop you in the wrong place)
- Nearest train station and approximate taxi fare
- Any organised transport you’ve arranged (shuttle buses, for example)
- Rideshare options if relevant
Dress code details
If your invitation says “black tie” or “garden party attire”, your wedding website is the place to add a little more context – especially if the venue has specific requirements (outdoor ceremony, uneven ground, etc.).
Guests appreciate the clarity, and it reduces the number of anxious outfit-related messages you’ll receive.
Designing your Bridebook wedding website
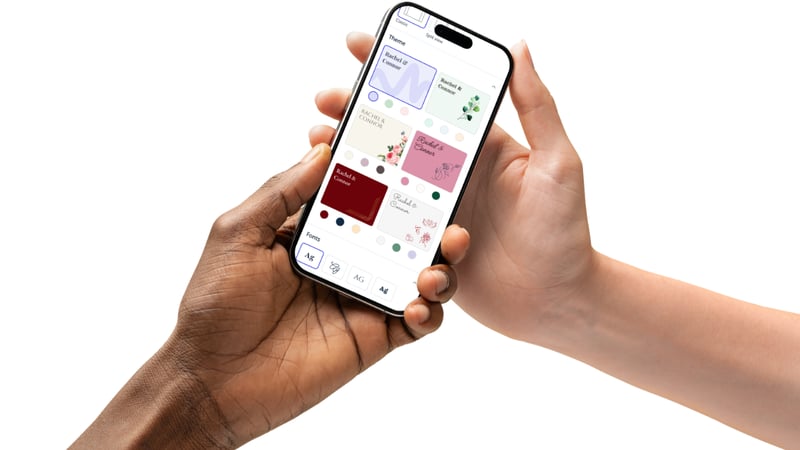
Getting the content right matters, but the design matters too – it sets the tone before guests read a single word.
Bridebook offers a range of themes with pre-set colour palettes, so you can find something that feels right for your wedding aesthetic without starting from scratch. From there, you can customise fonts, colours, and accents to match your stationery or venue.
On photos: Your cover photo is the first thing guests see. Use something you love – an engagement shoot image, a favourite holiday photo, or even a casual snap that captures who you are as a couple.
Avoid anything blurry or heavily filtered; natural light and genuine smiles always land best.
Privacy settings: keeping your website secure
Your wedding details are personal – you don’t want them indexed on Google or accessible to anyone who stumbles across the link.
Bridebook lets you:
- Set a password so only guests with the link and password can access the site
- Choose a custom URL – something personal that you share directly with guests, rather than a randomly generated string
- Preview your design before publishing so you can see exactly what guests will see before it goes live
Tips on wedding website wording
A few principles that make a big difference:
Write like you talk. Your wedding website doesn’t need to sound formal. If you and your partner are warm and funny people, let that show. Guests will enjoy it more.
Be specific with logistics. “Arrive around 2pm” is less useful than “Please be seated by 1:45pm as the ceremony will begin promptly at 2pm.” Specificity prevents late arrivals and confusion.
Use clear headings. Most guests will scan your website looking for the specific section they need. Make sure every section has a clear, obvious heading – not a clever pun that only you understand.
Update it as plans evolve. Don’t treat your website as something you set up once and forget. As your menu is confirmed, accommodation is arranged, and the schedule is finalised, keep it updated. Guests who check back before the wedding will appreciate seeing the most current information.
When to set up your wedding website

The earlier, the better – ideally before your save the dates go out so you can include the URL from the start. This way, guests have somewhere to go immediately and you can direct all enquiries there from day one.
At the very latest, your wedding website should be live before your invitations are sent, as many couples now include their website URL on their invite.
Frequently asked questions
What’s the difference between a wedding website and a wedding invitation? Your invitation announces the wedding with the essential details. Your website expands on everything else — the full schedule, directions, gift list, FAQs, and more. Think of the invite as the headline and the website as the full article.
Does my wedding website need a password? It’s not mandatory, but it’s strongly recommended. A password keeps your personal details private and means only your invited guests can access the site. Bridebook makes this easy to set up.
When should I set up my wedding website? As early as possible – ideally before your save the dates are sent, so you can include the URL from the start. Even a basic site with just your names, date, and venue is better than nothing.
What photos should I put on my wedding website? Your cover photo is the most important one – use something clear, well-lit, and genuine. An engagement shoot image works perfectly. For the ‘Our Story’ section, a mix of photos from your relationship adds warmth and personality.
Do I need an FAQ section on my wedding website? Yes – it’s one of the most useful things you can add. Think about the questions you’re already being asked and answer them here. It will save you a significant amount of time in the run-up to the wedding.
How long should my ‘Our Story’ section be? A few paragraphs is ideal – long enough to feel personal, short enough that guests actually read it. Cover how you met, a memorable early moment, and the proposal. Add photos to bring it to life.
Your wedding website doesn’t need to be perfect on day one. Start with the essentials – names, date, venue, RSVP – and build it out as your plans come together. The key is getting it live early, keeping it updated, and making it easy for guests to find whatever they need.
Set up your free wedding website with Bridebook →
Related articles